Main components
As I currently have no access to a workshop, nor have a garage I decided to build this robot using pre-fabricated non-expensive components. The most important components are listed below- Arduino UNO board
- Adafruit Motor/Stepper/Servo Shield for Arduino kit - v1.0
- DFRobot's 2WD Mobile Platform
- DFRobot's Wheel encoders
- Lynxmotion Pan and Tilt Kit
- Devantech SRF05 Ultrasonic Range Finder
- Pololu's IR Range finder (with Sharp GP2Y0D810Z0F Sensor)
- DFRobot's IR Kit
- Bumper Switch Assembly Kit
Building Robot
- Capacitor Filters
Capacitors soldered to the motor. Without such RC filter this cheap brushed motor creates so much electric noise that microcontroller goes mad (especially hardware interrupts are affected).

- Lower deck completed
Motors, wheel encoders, bumper switches, and a battery case installed.

- Wheel encoder - close-up view

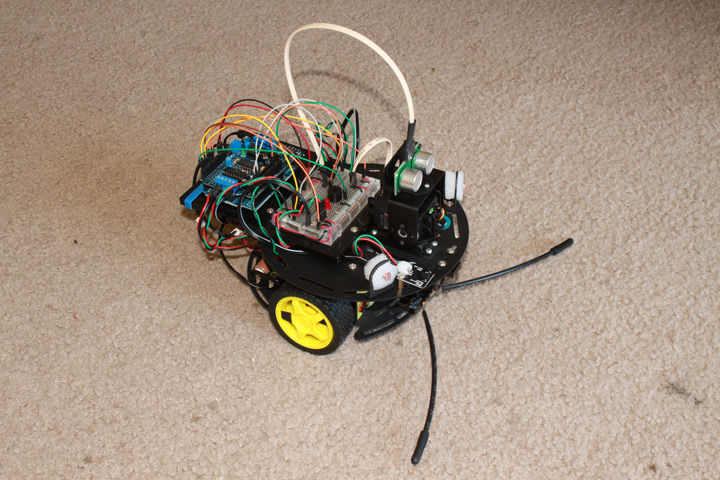
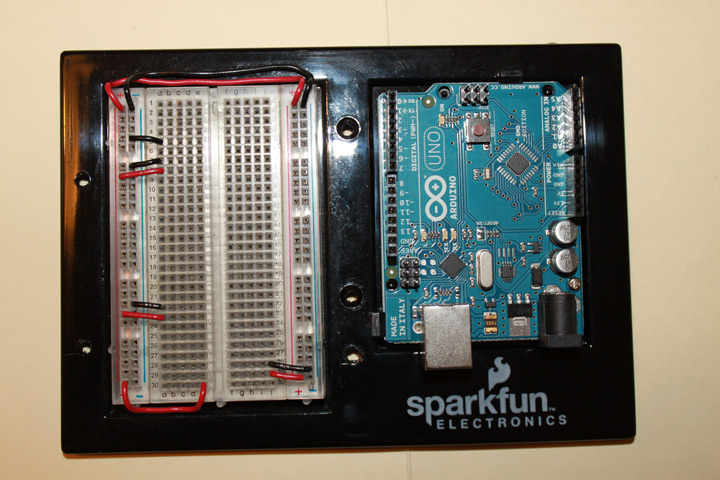
- Robot brain "Made in Italy"
An Arduino board and a solderless breadboard installed on a SparkFun's Holder. I made additional holes in the holder for fastening it to the robot's upper deck. I also made a hole in a small plastic pole in the lower right of the holder's Arduino slot for fastening Arduino board with a small screw (visible just above the Arduino's DC power jack).
- Upper deck
before installation of microcontroller board. M3x10 hexagonal standoffs (4 brass hexagonal poles) turned out to be ideal for installation of the SparkFun's Holder - they fit into grooves on the underside of the holder board holding it parallel to the robot's deck. 2 Photocells, a Pan and Tilt kit, an IR receiver, and a power switch are installed at the front of the platform.

- Controller board installed
Arduino board, Adafruit Motor shield, and solderless breadboard as a single unit attached to the robot. On top of the main battery holder sits another holder (attached with violet rubber bands) for 9V battery providing Arduino with power.
- Motor shield
Adafruit Motor shield on top of the Arduino board.

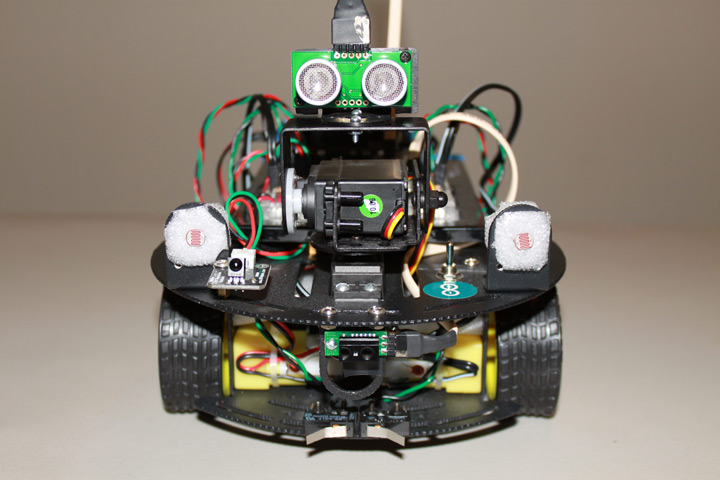
- Front sensors
Sensors at the front: IR receiver, Ultrasonic Range Finder (on top of the Pan and Tilt kit), Photocells, IR proximity sensor, Bumper switches
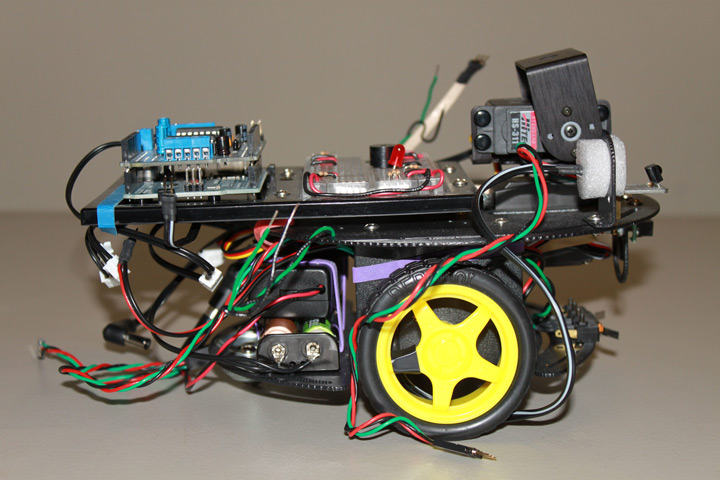
- Assembled robot: side view
Sensors wired to the MCU, only whiskers are missing

- Ready to go